Azure Face API — Advance Face Detection

→ This is used to embed facial recognition into our apps for a seamless and highly secured user experience.
→ Face API helps with advanced Face detection:
a. Age, Emotion, Glasses, Hair, Makeup
b. Detect human faces, find similar faces, and match faces with a group.
→ As we know face identification is complex — whether a person is wearing glasses, the angle of the person's image in different pics, light in pics, etc.
→ Let us see some of the images shared by the Microsoft team.


Different Face Groups from Microsoft:
→ Before using the API we should be aware of below four terminologies:
a. FaceList: This group supports a maximum of 1K faces.
b. LargeFaceList: This group supports a maximum of 1M faces.
→ So now if we want to identify a person, it is best we provide and train a maximum number of faces
c. PersonGroup: This group supports a maximum of 1K persons.
d. LargePersonGroup: This group supports a maximum of 1M persons.
Note:
This is similar to setting up Face unlock or finger biometric for the first time in a phone. The more different angle of faces or fingerprints system records, the more chance of phone unlocking
Getting Started with Face APIs:
→ There are mainly five APIs for Face:
Detect API, FindSimilar API, Group API, Identify API and Verify API

→ Let us start one by one:
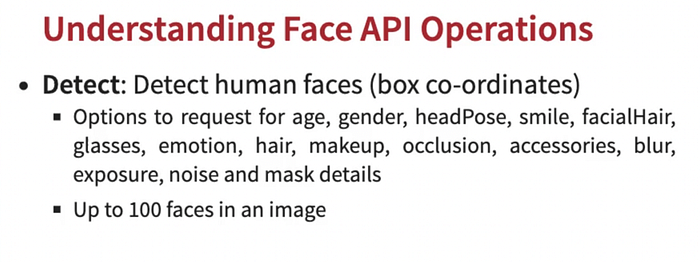
1. Detect API:
→ This API detects a human face in images — returns us co-ordinates
→ Based on the pic, Microsoft AI detects multiple attributes i.e. age, gender, head pose, smile, etc
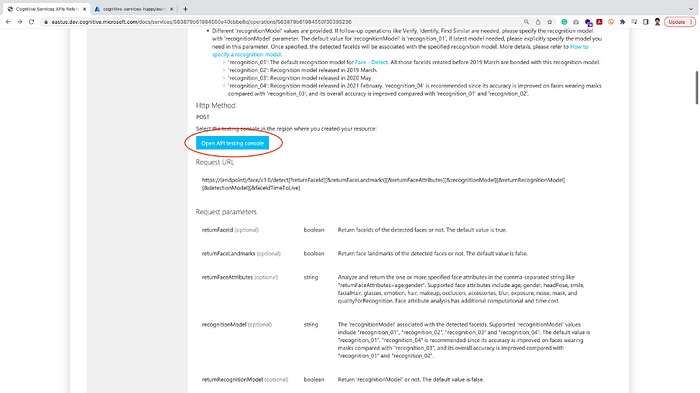
→ Check Detect API here
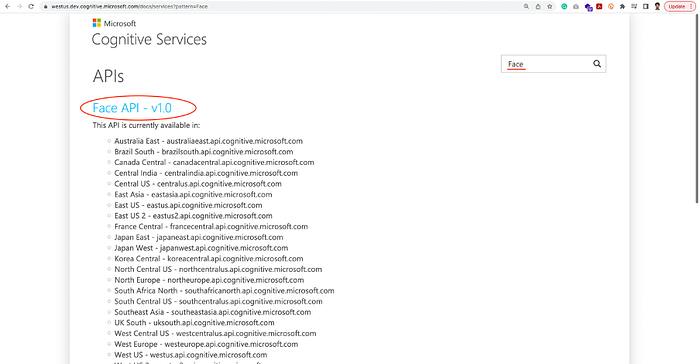
We can go to the Azure API console from the below link:
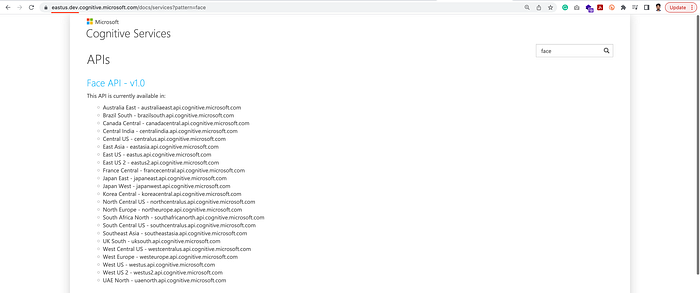
→ Search Face in the console. The latest version is v1.0 at present
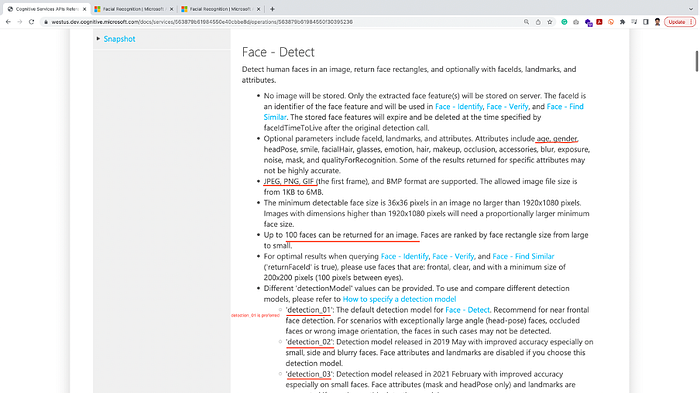
→ Let us see what Face Detect API helps us with:
→ Now to run this API we need three things:
- Cognitive Service API location
- Cognitive Service API Key
- Manual upload access approval from Microsoft for an account (this was previously not required, now mandatory)
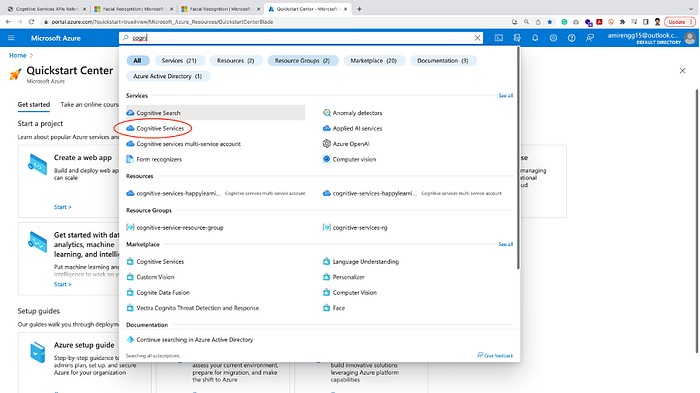
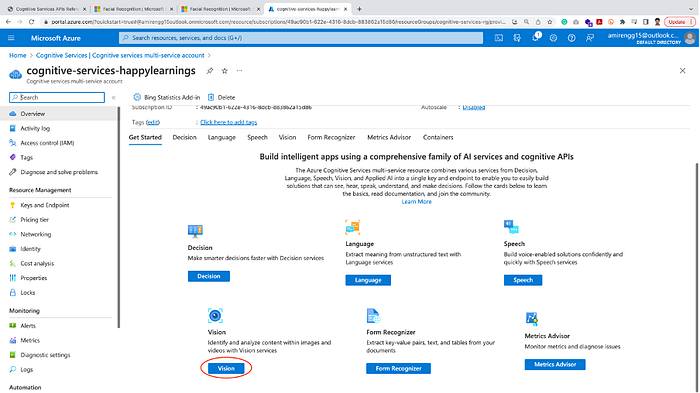
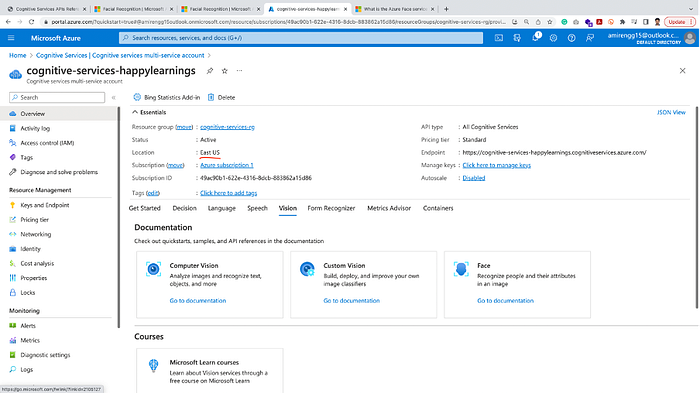
STEP 1: Go to Azure Portal, go to Cognitive Services
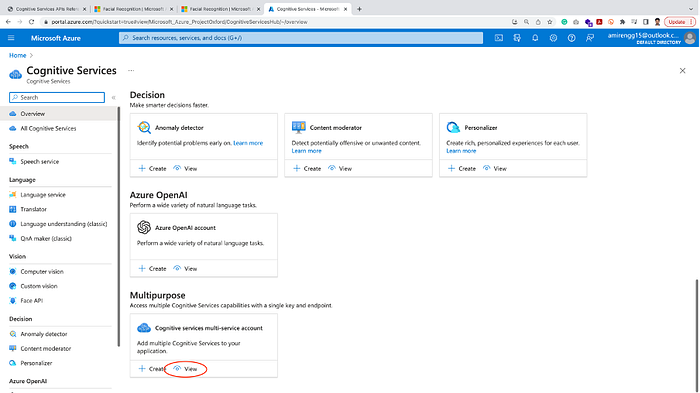
STEP 2: Click the view button in Multi-purpose services.
Note: We can also easily create a Multipurpose account. Check the video here.
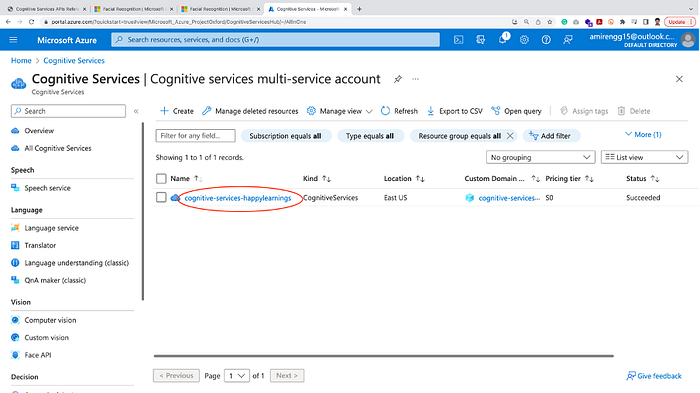
STEP 3: Click the API account created

NOTE:
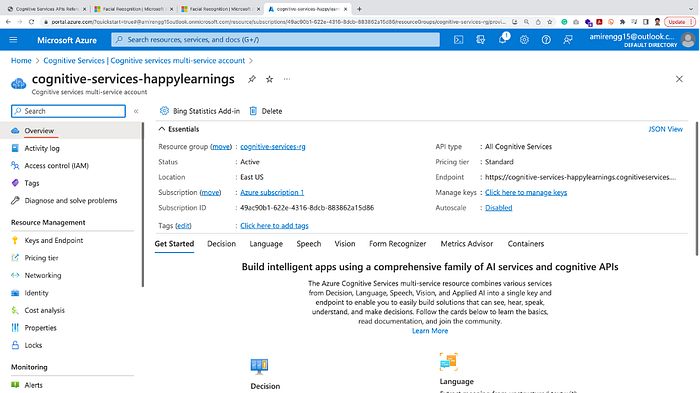
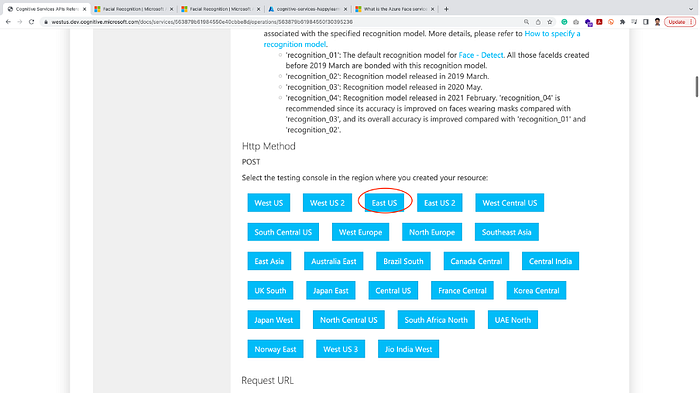
→ We need two things — Location and API Key (Controllable)
→ Location — East US (As per Azure account)
→ So Click on the same region which is there in Azure ie. East US
→ The second is the Key. Let us click the Key from the left in the Azure portal

→ Next step is to go to the console page of API:
→ A landing page API input box comes

→ Copy the name of your cognitive account in Resource Name:
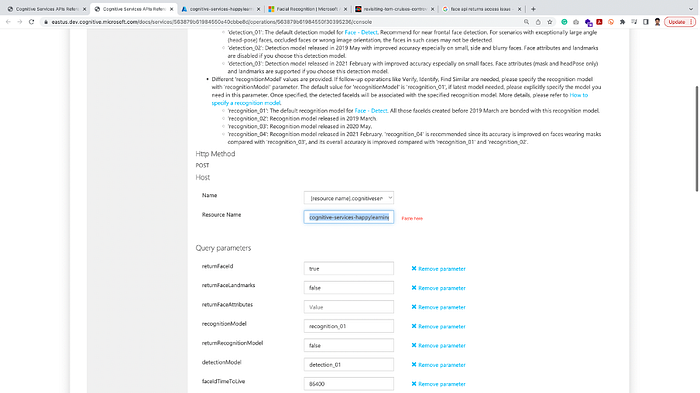
NOTE: Resource Name becomes part of the API
→ Now let us copy the Key of the cognitive account that we have copied.
→ We have to paste this in the Ocp-Apim-Subscription-Key input box.
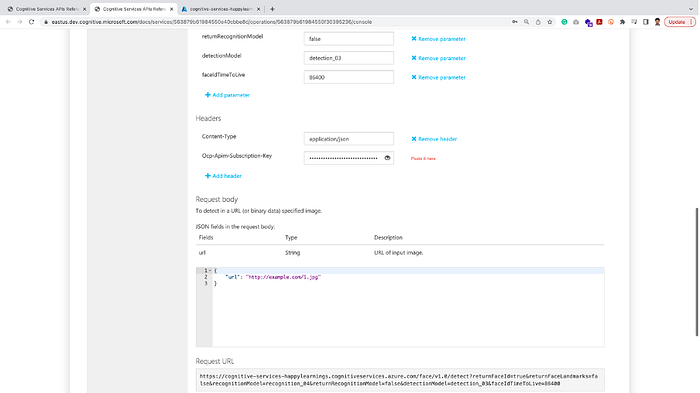
→ Now we paste an image whose data we need to extract from image

NOTE: Hitting this URL should return an image in the browser

→ Let us now hit the API from send button:
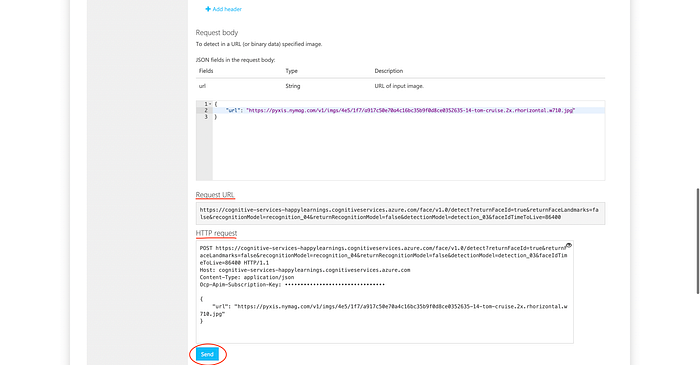
→ We observe that we get 403 error from API
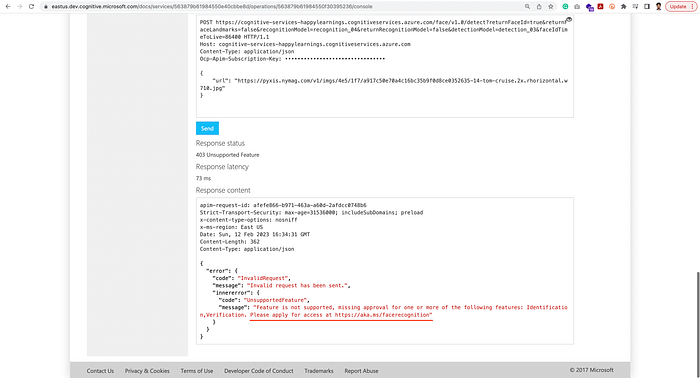
Request URL:
https://cognitive-services-happylearnings.cognitiveservices.azure.com/face/v1.0/detect?returnFaceId=true&returnFaceLandmarks=false&recognitionModel=recognition_04&returnRecognitionModel=false&detectionModel=detection_03&faceIdTimeToLive=86400HTTP Request:
POST https://cognitive-services-happylearnings.cognitiveservices.azure.com/face/v1.0/detect?returnFaceId=true&returnFaceLandmarks=false&recognitionModel=recognition_04&returnRecognitionModel=false&detectionModel=detection_03&faceIdTimeToLive=86400 HTTP/1.1
Host: cognitive-services-happylearnings.cognitiveservices.azure.com
Content-Type: application/json
Ocp-Apim-Subscription-Key: ••••••••••••••••••••••••••••••••

{
    "url": "https://pyxis.nymag.com/v1/imgs/4e5/1f7/a917c50e70a4c16bc35b9f0d8ce0352635-14-tom-cruise.2x.rhorizontal.w710.jpg"
}
Current Response:
apim-request-id: afefe866-b971-463a-a60d-2afdcc0748b6
Strict-Transport-Security: max-age=31536000; includeSubDomains; preload
x-content-type-options: nosniff
x-ms-region: East US
Date: Sun, 12 Feb 2023 16:34:31 GMT
Content-Length: 362
Content-Type: application/json

{
  "error": {
    "code": "InvalidRequest",
    "message": "Invalid request has been sent.",
    "innererror": {
      "code": "UnsupportedFeature",
      "message": "Feature is not supported, missing approval for one or more of the following features: Identification,Verification. Please apply for access at https://aka.ms/facerecognition"
    }
  }
}
→ This is actually extra security with AI recently taken by Microsoft for Limited access support by default.
→ We need to first get it approved from Microsoft from the below site:
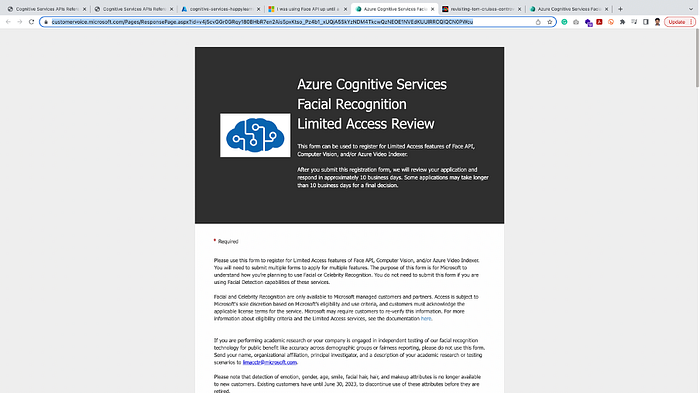
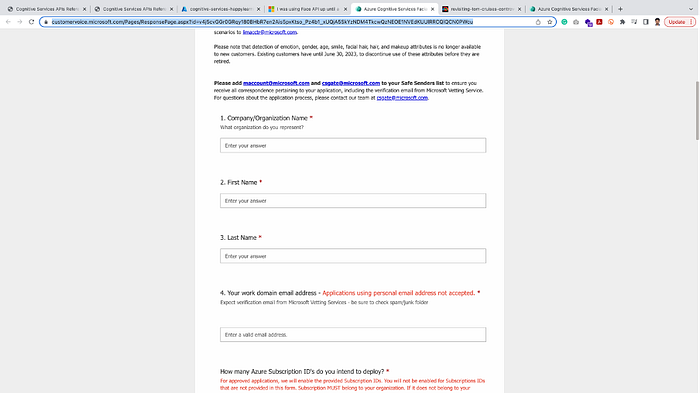
→ Once it is approved by Microsoft (it takes 10 business days from the Microsoft side)
NOTE: Please do not send approval for practice purposes. Mostly intended for actual usage. It was open long time Microsoft side.
As AI must be used with be used with precaution, they have taken this step recently.
→ Once the API gets approved, we get a response something like the below:
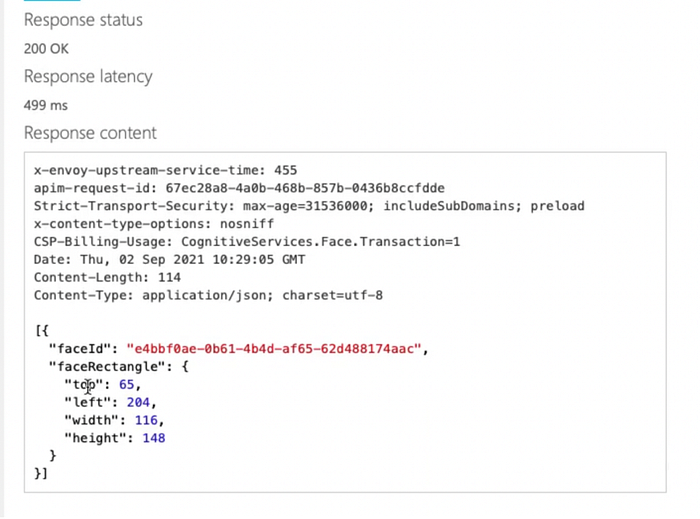
→ Detect API basically returns us with face ID. Also some attributes as well — age, gender (based on pic 😅)
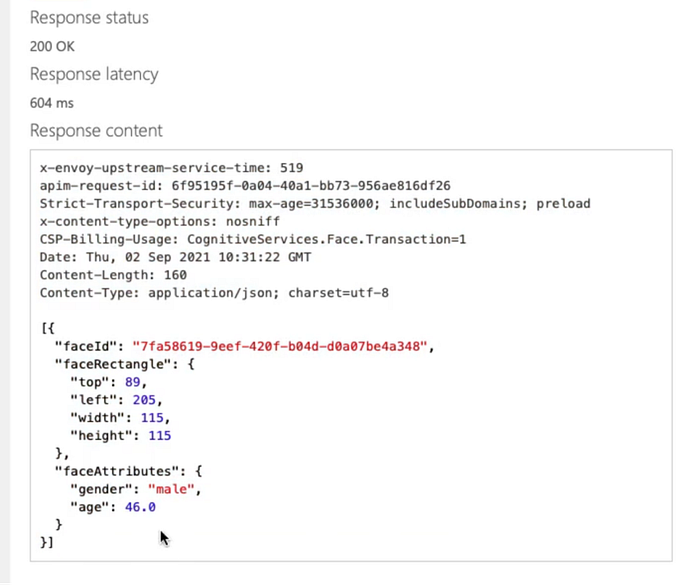
Response after approval:
[
    {
        "faceId": "c5c24a82-6845-4031-9d5d-978df9175426",
        "recognitionModel": "recognition_03",
        "faceRectangle": {
            "width": 78,
            "height": 78,
            "left": 394,
            "top": 54
        },
        "faceLandmarks": {
            "pupilLeft": {
                "x": 412.7,
                "y": 78.4
            },
            "pupilRight": {
                "x": 446.8,
                "y": 74.2
            },
            "noseTip": {
                "x": 437.7,
                "y": 92.4
            },
            "mouthLeft": {
                "x": 417.8,
                "y": 114.4
            },
            "mouthRight": {
                "x": 451.3,
                "y": 109.3
            },
            "eyebrowLeftOuter": {
                "x": 397.9,
                "y": 78.5
            },
            "eyebrowLeftInner": {
                "x": 425.4,
                "y": 70.5
            },
            "eyeLeftOuter": {
                "x": 406.7,
                "y": 80.6
            },
            "eyeLeftTop": {
                "x": 412.2,
                "y": 76.2
            },
            "eyeLeftBottom": {
                "x": 413.0,
                "y": 80.1
            },
            "eyeLeftInner": {
                "x": 418.9,
                "y": 78.0
            },
            "eyebrowRightInner": {
                "x": 4.8,
                "y": 69.7
            },
            "eyebrowRightOuter": {
                "x": 5.5,
                "y": 68.5
            },
            "eyeRightInner": {
                "x": 441.5,
                "y": 75.0
            },
            "eyeRightTop": {
                "x": 446.4,
                "y": 71.7
            },
            "eyeRightBottom": {
                "x": 447.0,
                "y": 75.3
            },
            "eyeRightOuter": {
                "x": 451.7,
                "y": 73.4
            },
            "noseRootLeft": {
                "x": 428.0,
                "y": 77.1
            },
            "noseRootRight": {
                "x": 435.8,
                "y": 75.6
            },
            "noseLeftAlarTop": {
                "x": 428.3,
                "y": 89.7
            },
            "noseRightAlarTop": {
                "x": 442.2,
                "y": 87.0
            },
            "noseLeftAlarOutTip": {
                "x": 424.3,
                "y": 96.4
            },
            "noseRightAlarOutTip": {
                "x": 446.6,
                "y": 92.5
            },
            "upperLipTop": {
                "x": 437.6,
                "y": 105.9
            },
            "upperLipBottom": {
                "x": 437.6,
                "y": 108.2
            },
            "underLipTop": {
                "x": 436.8,
                "y": 111.4
            },
            "underLipBottom": {
                "x": 437.3,
                "y": 114.5
            }
        },
        "faceAttributes": {
            "age": 71.0,
            "gender": "male",
            "smile": 0.88,
            "facialHair": {
                "moustache": 0.8,
                "beard": 0.1,
                "sideburns": 0.02
            },
            "glasses": "sunglasses",
            "headPose": {
                "roll": 2.1,
                "yaw": 3,
                "pitch": 1.6
            },
            "emotion": {
                "anger": 0.575,
                "contempt": 0,
                "disgust": 0.006,
                "fear": 0.008,
                "happiness": 0.394,
                "neutral": 0.013,
                "sadness": 0,
                "surprise": 0.004
            },
            "hair": {
                "bald": 0.0,
                "invisible": false,
                "hairColor": [
                    {"color": "brown", "confidence": 1.0},
                    {"color": "blond", "confidence": 0.88},
                    {"color": "black", "confidence": 0.48},
                    {"color": "other", "confidence": 0.11},
                    {"color": "gray", "confidence": 0.07},
                    {"color": "red", "confidence": 0.03}
                ]
            },
            "makeup": {
                "eyeMakeup": true,
                "lipMakeup": false
            },
            "occlusion": {
                "foreheadOccluded": false,
                "eyeOccluded": false,
                "mouthOccluded": false
            },
            "accessories": [
                {"type": "headWear", "confidence": 0.99},
                {"type": "glasses", "confidence": 1.0},
                {"type": "mask"," confidence": 0.87}
            ],
            "blur": {
                "blurLevel": "Medium",
                "value": 0.51
            },
            "exposure": {
                "exposureLevel": "GoodExposure",
                "value": 0.55
            },
            "noise": {
                "noiseLevel": "Low",
                "value": 0.12
            },
            "qualityForRecognition": "high"
        }
    }
]
2. Find a Similar API:
→ This feature of Face API is also important.
→ There is a group of images and we have to find an image that is similar to a specific image.
The input of this API:
a. Face ID
b. Group of Faces i.e. Face Id array or FaceListId or LargeFaceId
Output:
Array of most similar Faces [along with confidence score]Eg:
Request URL:
https://{endpoint}/face/v1.0/findsimilarsRequest Body:
{
    "faceId": "c5c24a82-6845-4031-9d5d-978df9175426",
    "largeFaceListId": "sample_list",
    "maxNumOfCandidatesReturned": 10,
    "mode": "matchPerson"
}
Response:
[
    {
        "persistedFaceId" : "015839fb-fbd9-4f79-ace9-7675fc2f1dd9",
        "confidence" : 0.82
    },
    ...
]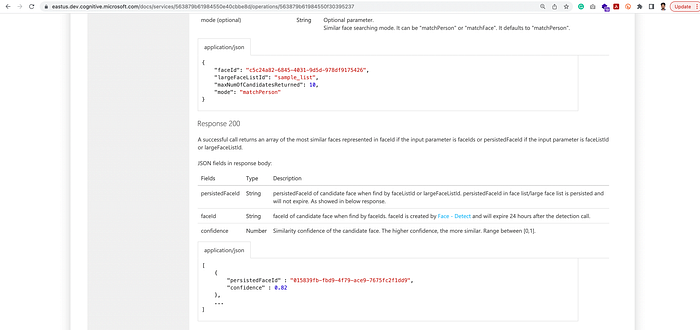
Check more here.
3. Group API:
The input of this API:
Multiple array of face idsOutput:
Matching group of face idsRequest URL:
https://{endpoint}/face/v1.0/groupRequest Body:
{
    "faceIds": [
        "c5c24a82-6845-4031-9d5d-978df9175426",
        "015839fb-fbd9-4f79-ace9-7675fc2f1dd9",
        "65d083d4-9447-47d1-af30-b626144bf0fb",
        "fce92aed-d578-4d2e-8114-068f8af4492e",
        "30ea1073-cc9e-4652-b1e3-d08fb7b95315",
        "be386ab3-af91-4104-9e6d-4dae4c9fddb7",
        "fbd2a038-dbff-452c-8e79-2ee81b1aa84e",
        "b64d5e15-8257-4af2-b20a-5a750f8940e7"
    ]
}
Response:
{
    "groups": [
        [
            "c5c24a82-6845-4031-9d5d-978df9175426",
            "015839fb-fbd9-4f79-ace9-7675fc2f1dd9",
            "fce92aed-d578-4d2e-8114-068f8af4492e",
            "b64d5e15-8257-4af2-b20a-5a750f8940e7"
        ],
        [
            "65d083d4-9447-47d1-af30-b626144bf0fb",
            "30ea1073-cc9e-4652-b1e3-d08fb7b95315"
        ]
    ],
    "messyGroup": [
        "be386ab3-af91-4104-9e6d-4dae4c9fddb7",
        "fbd2a038-dbff-452c-8e79-2ee81b1aa84e"
    ]
}
→ So basically we are making a group using a similar person.
→ Check more here.
4. Identity API:
This API takes two inputs:
1st: Face Id
2nd: Group of Face Ids
Output:
Person candidates for that face (ranked by confidence score)Eg:
Request URL:
https://{endpoint}/face/v1.0/identifyRequest Body:
{
    "largePersonGroupId": "sample_group",
    "faceIds": [
        "c5c24a82-6845-4031-9d5d-978df9175426",
        "65d083d4-9447-47d1-af30-b626144bf0fb"
    ],
    "maxNumOfCandidatesReturned": 1,
    "confidenceThreshold": 0.5
}
Response:
[
    {
        "faceId": "c5c24a82-6845-4031-9d5d-978df9175426",
        "candidates": [
            {
                "personId": "25985303-c537-4467-b41d-bdb45cd95ca1",
                "confidence": 0.92
            }
        ]
    },
    {
        "faceId": "65d083d4-9447-47d1-af30-b626144bf0fb",
        "candidates": [
            {
                "personId": "2ae4935b-9659-44c3-977f-61fac20d0538",
                "confidence": 0.89
            }
        ]
    }
]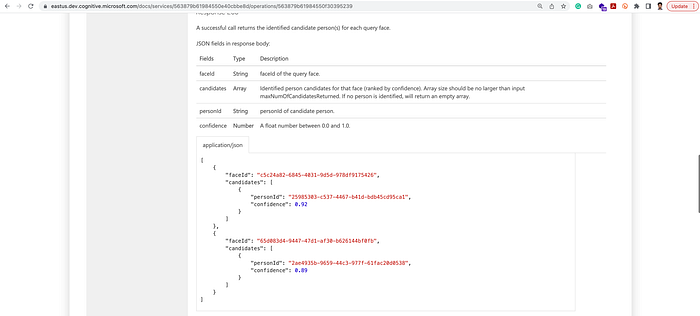
Check more here.
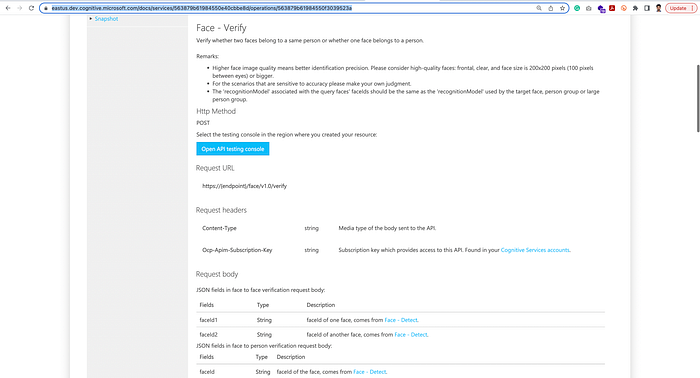
5. Verify API:
→ Here we basically provide two face ids and let Azure Vision API check for the match
→ Here we can also check if both face id belongs to a specific person
This API takes two inputs:
1st: Face Id 1
2nd: Face Id 2
Output:
Response telling us if both faces matches or matches to specific person.Eg:
Request URL:
https://{endpoint}/face/v1.0/verifyRequest Body:
{
    "faceId": "c5c24a82-6845-4031-9d5d-978df9175426",
    "personId": "815df99c-598f-4926-930a-a734b3fd651c",
    "largePersonGroupId": "sample_group"
}
Response:
{
    "isIdentical": true,
    "confidence": 0.9
}
→ Check more here
Closing Thoughts:
In this article, we have learned about Azure’s Face API of Vision service. Here we have seen the five face recognition APIs.
Based on an application need we see how powerful an application becomes with Face recognizing capabilities.
Thank you for reading till the end 🙌 . If you enjoyed this article or learned something new, support me by clicking the share button below to reach more people and/or give me a follow on Twitter and subscribe Happy Learnings !! to see some other tips, articles, and things I learn about and share there.